• HOME
  • FASHION
    • Spring & Summer Fashion
    • Trending Now
    • Fall Fashion
  • BEAUTY
    • Makeup Looks
    • Skin Care
  • LIFESTYLE
    • Home
    • Travel
    • Food & Drink
    • My Wedding Series
  • SHOP MY INSTAGRAM
  • SHOP
    • Fall Home Decor
    • Shop My Holiday Gift Guides
    • My Discount Codes
    • MY AMAZON FAVS
    • Current Fashion Favorites
    • Beauty Favorites
    • MY HOME DECOR
    • SHOP MY LiketoKnow.It
  • HOLIDAY
    • Shop My Holiday Gift Guides
    • Gift Guides for HIM
    • Gift Guides for HER
    • HOLIDAY DECOR
    • HOLIDAY OUTFITS
    • Holiday Gift Guides
  • Contact
    • Privacy Policy

Follow Me

  • Bloglovin
  • Facebook
  • Instagram
  • Pinterest
  • Twitter
  • YouTube

Kelsie Kristine

Beauty, Fashion & Lifestyle Blog

Beauty Mix | How To Do a Cut Crease

November 9, 2018 Beauty, BeautyMix Series

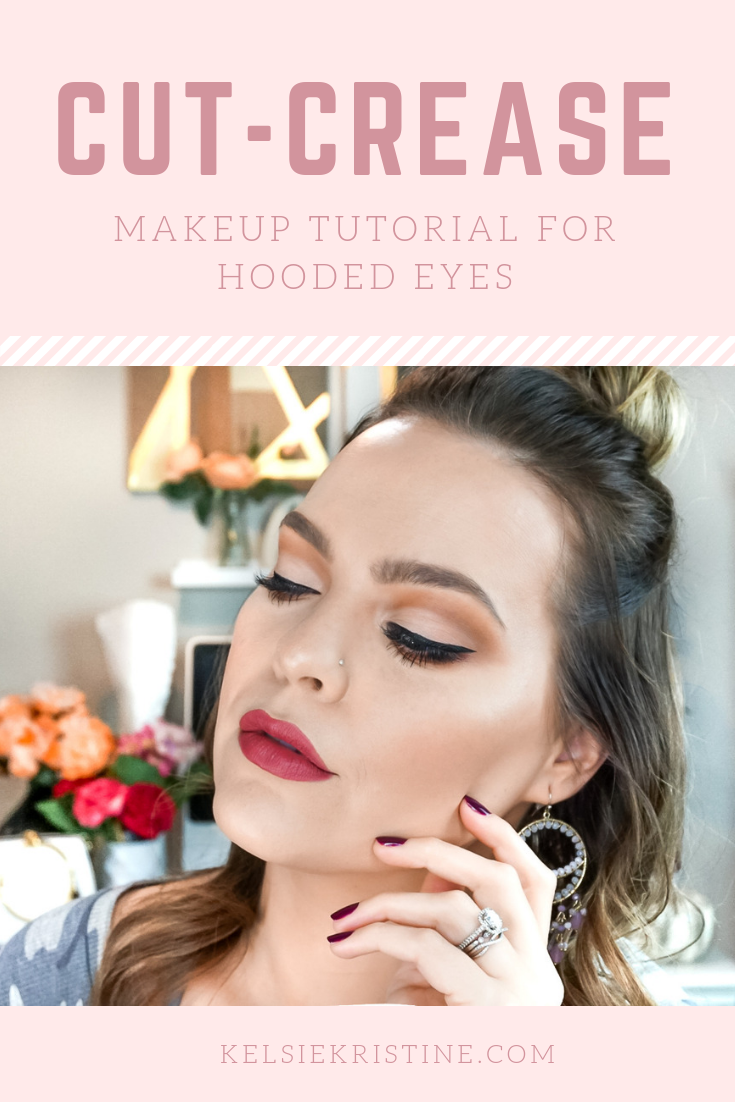
It’s Friday, which means it’s time for another Beauty Mix post! I’ve shared similar looks to this in the past (I know – very similar to last week’s look), but for this look, I wanted to explain how to do a cut crease, especially if you are someone with hooded eyes.

{If you don’t know what the Beauty Mix Series is, a few other beauty bloggers,  Jasmine, Ashleigh, Lily and I have collaborated to do a makeup look each week based on a certain theme/color! We’ve also added another blogger to the mix recently too, Lisette. You can check out all of the previous Beauty Mix posts HERE! }

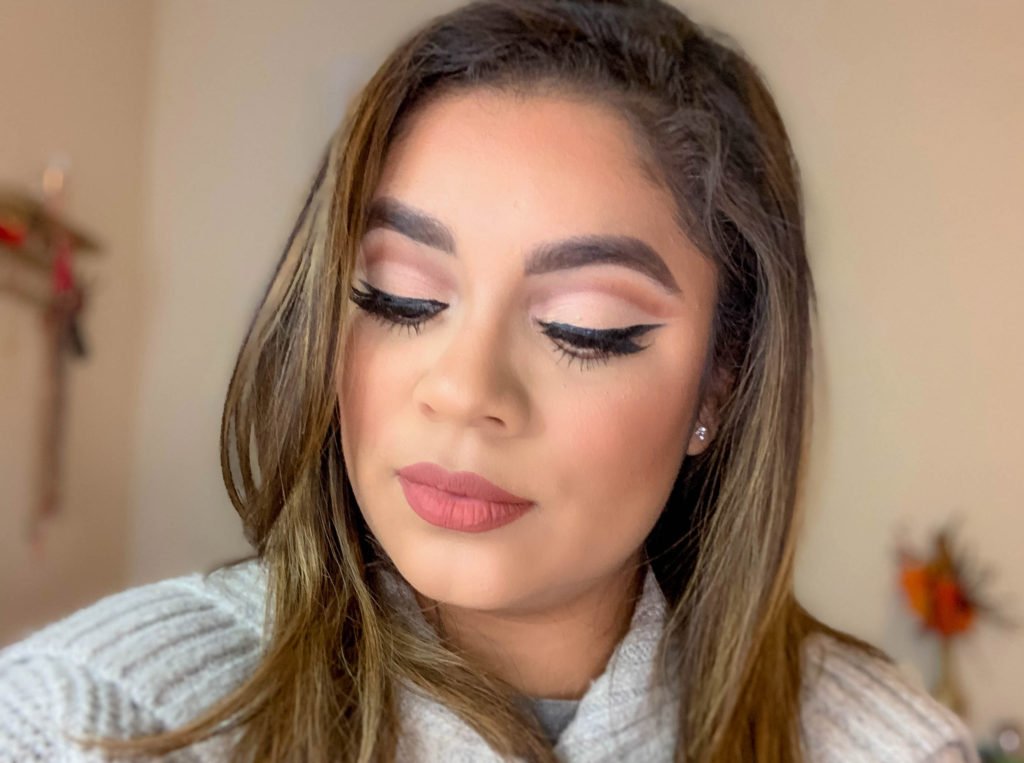
I have slightly hooded eyes, and if you don’t know what that means, hooded eyes are when you open your eyes and the top of your lid covers your lower eyelid. When doing a cut crease with hooded eyes, the goal is to be sure you see the lid color when you open your eyes. We don’t want it lost when the eye is open.

How to do a Cut Crease

  • Start with an eye shadow base – I like to use the Mac (Not Matte like I say in the video – oops) Pro Longwear Paint Pot in Soft Ochre with the Sephora concealer brush. I use the brush to apply it and then use my ring finger to really pack it on and get rid of any creases.
  • Set your base. I like to use a light colored shadow or translucent setting powder. This is going to help set that base and also help with applying the next shadows and making sure they blend well.
  • Go in with your shadows. I start with a transition shade – a neutral brown shade and then layer on other shadows with it. You can see all the shadows and how I apply them in the video. You want to be sure that you are placing shadow above the crease in an ombre like effect.
  • Deepen up the crease, giving an outline to where you are going to cut the crease. I use a pencil brush for this and a dark eye shadow.
  • Cut the Crease – after the shadow is to your liking, we can now cut the crease. I take any concealer, preferably a lighter one like Tarte Shape Tape and place a little on the back of my hand. I use the concealer brush and saturate both sides with the concealer. I flatten the brush as much as I can and make sure it’s in a rounded shape at the top so it applies best! Then for the best tip. If you have hooded eyes, you can place a little bit of product on your lower lid, close to your lashes and then look up. The product will then transfer to the top of you lid space and will be a guide as to where you should cut the crease. Make a half moon on the lid and cover it with the concealer.
  • Set the lid– once the lid is how you want it, go in with a setting powder or neutral eye shadow and lock it in place. Be sure there are no creases before you put powder on it. Use your ring finger (it has the lightest pressure) to pat out any creases before applying.
  • Diffuse the edge – I personally do not like a super CUT crease, so I go in and diffuse out the shadow just above the cut line, being careful not to drag it onto the lid space or you will have to go back in and clean it up. TIP: Use what’s left on the concealer brush to clean up any lines or mistakes made.
  • Apply the Lid Color – lastly, apply your lid color – I prefer a bright or white color that will pop against the color placed on the upper lid.
  • Side note – if you are doing winged liner or any kind of liquid liner with this, you may want to keep it on the thin side so your cut crease stands out more!

Voila! You are done with the cut crease and can finish up the eyes how you like! Watch the video below for a better look at how to achieve this look! I’m not a wizard with makeup and I taught myself how to do this over time. Practice makes perfect!

The Look

This look is VERY similar to last week’s look, I know, but as you’ll see in the video, my original plan didn’t go so well when the colors I was using weren’t blending. I ended up using the Urban Decay Naked Petite Heat palette for all of the shadows in this look.

Products Used

Eyes + Brows:
Eyeshadow Primer: Mac ProLongwear Paint Pot in Soft Ochre
Eyeshadow: Urban Decay Naked Petite Heat Palette
Concealer for Cut Crease: Tarte Creaseless Concealer
Setting powder for base and concealer: Laura Mercier Translucent Setting Powder
Eyeliner: Urban Decay Perversion Liner
Water line liner: Pixi by Petra Eye Bright Liner
Mascara: Lancome Monseur Big Mascara
Lashes: Lash Extensions from DollEyes in Monona, WI
Lash Serum I’ve been using: Grande Lash MD (You can use this with lash extensions too!) & it will be on sale for the Sephora Holiday Sale that I shared about earlier this week!
Brows: Anastasia Beverly Hills Brow Definer Pencil in Soft Brown


Face + Lips:
Primer: Smashbox Photo Finish Pore Minimizing Primer
Foundation: Estee Lauder Double Wear Stay in Place Makeup
Concealer: Tarte Creaseless Concealer
Setting Powder: Laura Mercier Translucent Setting Powder
Highlighter: Becca Champagne Pop
Bronzer: Estee Lauder Bronze Goddess
Blush: Milani Baked Blush in Luminoso
Setting Spray: Urban Decay All Nighter Setting Spray
Lips: Maybelline Creamy Matte Lipstick in Touch of Spice


Brushes/Sponges:
Sephora Concealer Brush
Pencil Brush
Sigma F80 Kabuki Brush
Morphe M433 Brush
Sigma E38 Diffused Crease Brush
Laura Mercier Powder Puff
BH Cosmetics V2 Brush
BH Cosmetics V3 Contour Brush (for Bronzer)
Real Techniques Blush Brush
Real Techniques Setting Brush (for Highlighter)


What do you think of the cut crease look? Have you tried it before? Do you like doing them?

Don’t forget to check out the other ladies looks below!


Jasmine’s Cut Crease Look | Lisette’s Cut Crease Look

Thanks for reading/watching babes!! Until next time,


Leave a Comment

SHARE
« Sephora Holiday Event Picks
Trending Now: Leopard Print »

YOU MIGHT ALSO LIKE

  • Green and Red Holiday Makeup Look
  • How to Properly Overline Lips for a Fuller Look
  • Easy Summer Drugstore Makeup Look | Walmart Beauty
  • Getting a HydraFacial | Robertson Cosmetic Center

Kelsie Kristine

kelsie kristine

Welcome friends! My name is Kelsie.
I'm a dog mom & wife, married to a handsome handy man! My goal is to inspire women daily with affordable beauty, fashion, & home decor and to be the best girlfriend you never knew you needed! If I don’t have a coffee in hand, it’s a glass of red wine! Let's be friends - subscribe so you don't miss a post!
Learn more about me on my About Page.

Search KelsieKristine.com

Categories

Follow

Archives

Current Beauty Favs

Feautured Posts

Affordable Activewear + Spotify Playlist

One Day in Athens GREECE | Europe Travel Guide

March Beauty Product Hits & Misses

Current Fashion Favs

YouTube

SHOP

Where I LOVE to SHOP:
Ulta
Sephora
AMAZON
Target
H&M
Nordstrom
Nordstrom Rack
Express
Boohoo
SheIn
LOFT
Old Navy


Shop more of my closet on Poshmark
Fashion Favorites
shop beauty favs
shop office and beauty room home decor

– PARTNERS –

Disclaimer

Kelsie Kristine is a for-profit blog and partners with several brands and affiliate programs. Any brand or company that I choose to collaborate with is carefully selected by me because I feel as they fit the mission & readership of my blog. With any brand I work with, know that I genuinely love their products, and I think you will too! Some posts may contain affiliate links, meaning that any clicks on these links may result in a small commission to me, at no cost to you. All sponsored posts and affiliate link commissions go towards keeping Kelsie Kristine up and running! Thanks for supporting my blog!

kelsiekristine

Kelsie Kristine▪️Life & Style
Tips on Layering with Neutrals ⤵️⤵️

❇️SAVE this post to refer back to when wanting to style a neutral look ❇️

✳️Most taupes, tans and beiges go well together, but try to keep the saturation components fairly similar 

✳️Black is always a neutral 

✳️Mix textures- like here where I mixed faux leather, suede, & knit fabric. It gives the look some contrast while still making it cohesive. 

✳️I also prefer a pop of color in the accessories sometimes, but not necessary. 

✳️Play around with it- do what feels comfortable to you! 

❤️FOLLOW for more tips! 

Linking this whole look on LIKEtoKNOW.it 
http://liketk.it/36McI #liketkit @liketoknow.it  #stylingneutrals #monochromaticoutfit #neutraloutfit #popofcolor #howtostyle #kelsiekristineblog
✨Self Care Sunday✨Did you hear?! @briogeo is n ✨Self Care Sunday✨Did you hear?! @briogeo is now available at @ultabeauty ?! 🙌🏻🙌🏻 {#ad} I tried their new avocado + kiwi hair mask that smells heavenly 🥑🥝 & their be gentle shampoo + conditioner. My hair feels so amazing! I’m sharing these & a few other Briogeo products over on stories now! 

#ubcollective #ultabeautypartner #ultabeauty #selfcare #selfcaresunday #kelsiekristineblog
First time wearing sunglasses all year! The sun ma First time wearing sunglasses all year! The sun may be shining & it may look like a spring outfit but don’t let that fool you, the current temp here is 12 degrees (feels like 1) 😆 Brrrrr 🥶 I’ll take it tho if the sun will stay shining! ☀️ 

My shirt & jacket are 2 of the 20 favorite Amazon purchases from 2020! I went through all of my purchases from last year and picked out my top 20 favorites- shared it on the blog & YouTube channel! (Both links in my bio) Lots of goodies for the home, fashion items & more! 

Shop my outfit on LIKEtoKNOW.it http://liketk.it/36A5x #denimjacket #graphictee #wedgesneakers #winterootd #amazonfavs #kelsiekristineblog
Throwing it back to last year’s edgy VDay look! Throwing it back to last year’s edgy VDay look! 💋 Let’s be honest, this year I’ll probably be in sweats at home but I’m missing the days of travel & fun date nights! Soon...hopefully soon! Do you have any plans for VDay this year?! 

These faux leather shorts are perfect in the coolers months paired with tights & of course most of my outfit is from Amazon! Outfit linked here: http://liketk.it/36uat @liketoknow.it #liketkit #LTKVDay #tbt #valentinesdayoutfit #kelsiekristineblog
It may be cloudy everyday this month, but I’m he It may be cloudy everyday this month, but I’m here to brighten it up with this hot pink teddy coat! 💕I’ve been living in this jacket -in anything from athleisure to casual wear to all dressed up(kinda). It’s super versatile. I have a feeling this jacket won’t be around long so snag it while you can. Linked on the ‘Shop My Instagram’ tab on the blog & on LIKEtoKNOW.it - wearing my true size medium. http://liketk.it/36lp4 #teddycoat #pinkcoat #boldcolors #boldjacket #kelsiekristineblog
🚨MAJOR SALE ALERT🚨 It’s the last week for 🚨MAJOR SALE ALERT🚨 It’s the last week for the Love Your Skin Event happening at @ultabeauty & some of my FAVS are on sale this week! ⤵️⤵️

TODAY 1/18 the @skyniceland Dissolving Microneedle Eye Patches are 50% off! 

Tomorrow 1/19 the @peachandlily Glass Skin Refining Serum is 50% off! 

& Thursday 1/21 my absolute hands down fav cleansing balm ever- the @elemis Pro Collagen Cleansing Balm is 50% off! 

❇️SAVE this post to refer back to this week or check out the link in my stories for more sales throughout the week! #ubcollective #ultabeauty #ultabeautypartner #loveyourskin #skincare #kelsiekristineblog #nomakeup
Load More... Follow @itsmekelsie22